Snapshots are an efficient way to back up and restore data from a volume. They allow you to quickly create new VMs with the same configuration and data as the original volume, making them ideal for disaster recovery, scaling, or testing purposes.
Create a snapshot described in Volume Snapshot
Note: Please create the snapshot only for the bootable volume (the volume attached to the existing VM).
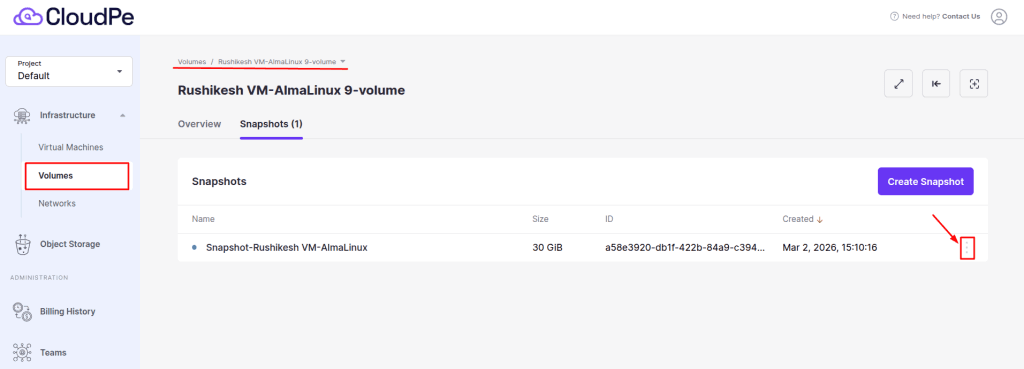
Step 1: Locate the Snapshot
- Log in to your CloudPe platform dashboard.
- Navigate to the Snapshots section. (Volumes >> Select the volume >> Snapshots)
- Identify the snapshot you want to use for creating the new VM. Ensure the snapshot is associated with the correct volume.
Step 2: Create a Volume/Image from the Snapshot
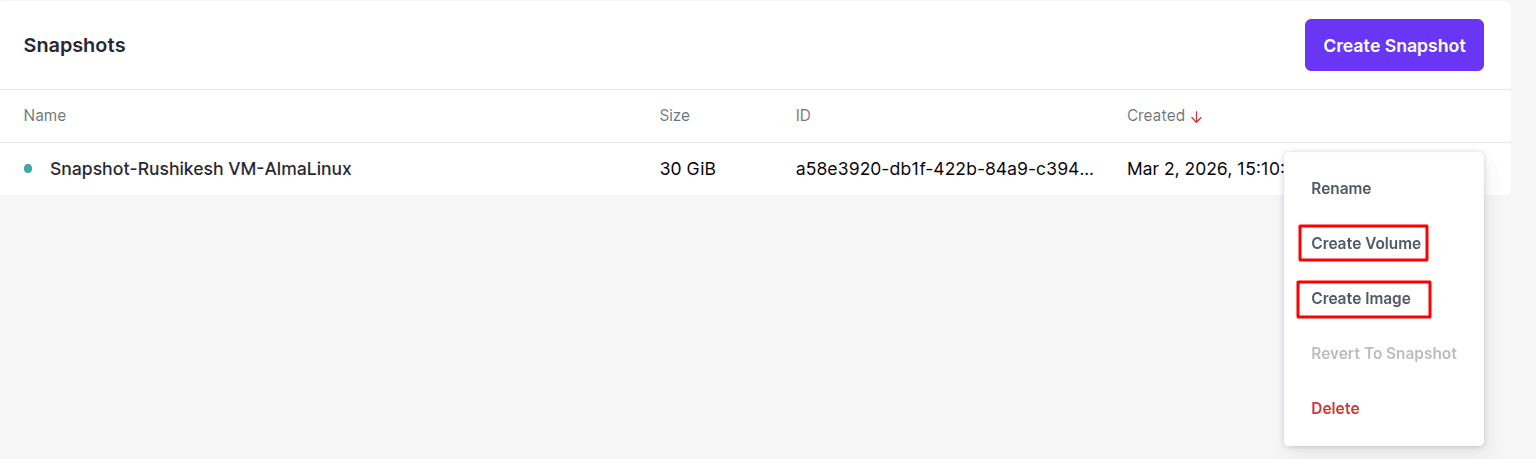
- Select the Snapshot: Click on the snapshot you identified in Step 1.
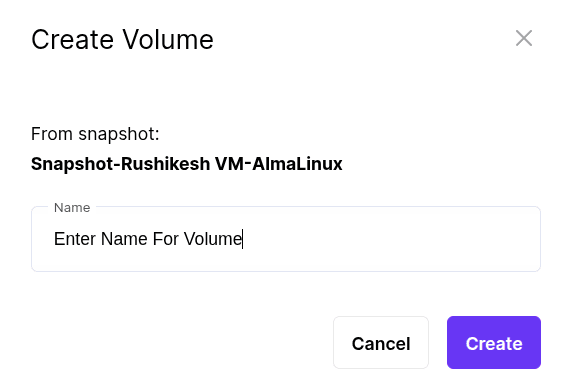
- Choose “Create Volume” button.
- Volume Name: Provide a name for the volume.
- Confirm and Create. Once completed, the volume will appear in the Volumes section.
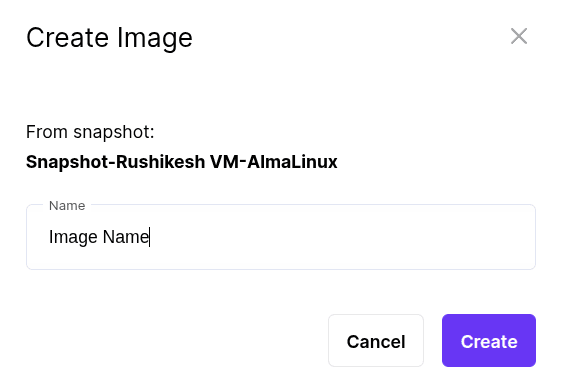
You can follow same steps to create a Image from the Snapshot. Choose “Create Image” button and Create.
Step 3: Create an Image from the Volume
Also you can use the existing Volumes or Volumes created by Snapshots to create the Image. Here are the steps:
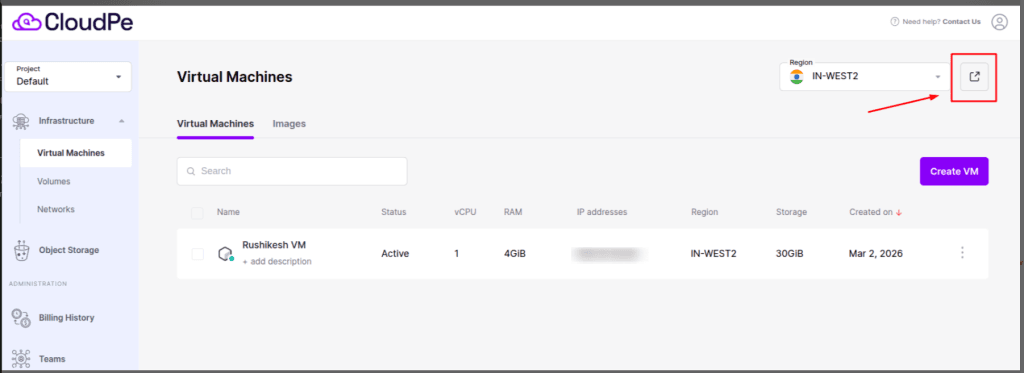
Navigate to the CloudPe Region Advanced Dashboard.
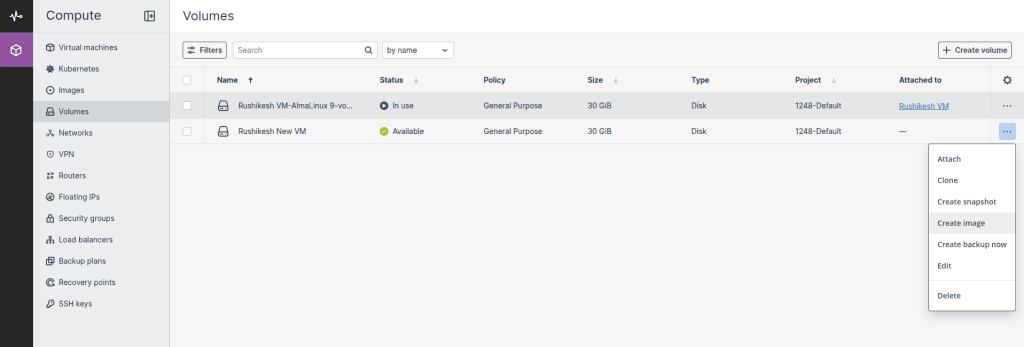
- In the dashboard, go to the “Compute” section and open the “Volumes” screen.
- Identify and select the boot volume from which you want to create an Image. click the three dots to open the actions menu.
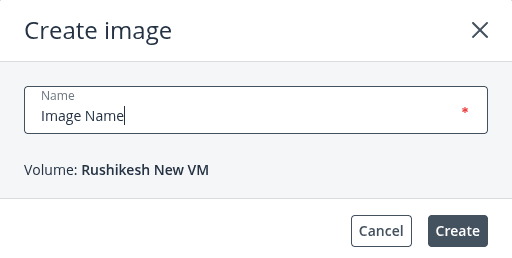
- In the Create image window, enter an image name and then click Create.

Step 4: Launch a New VM
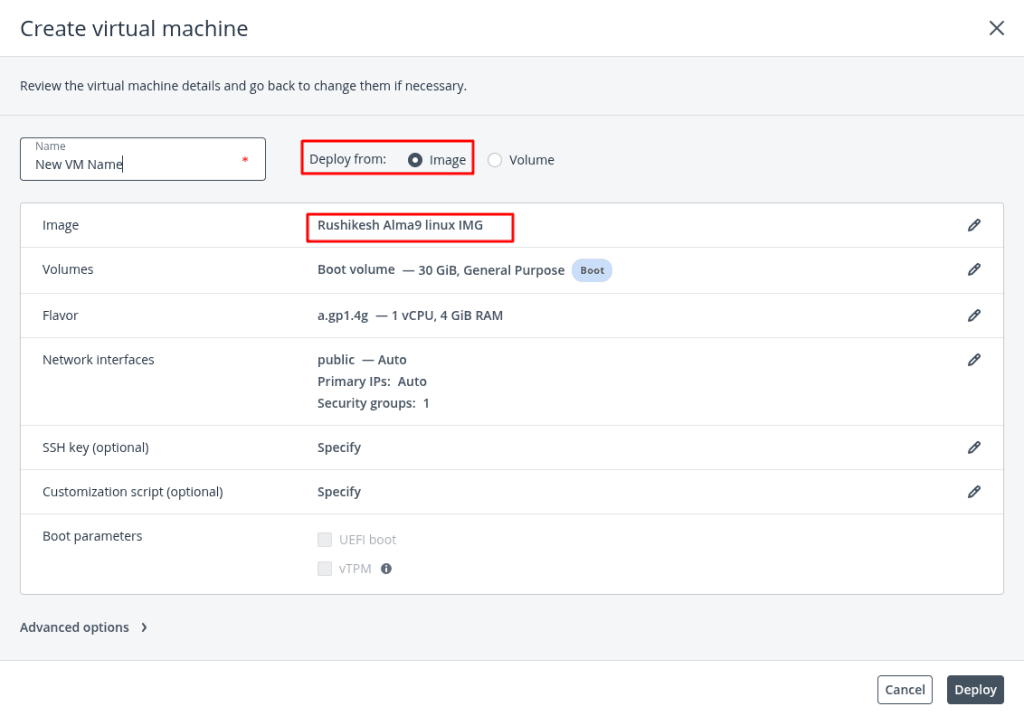
Choose the image that is uploaded to the Images section area in the CloudPe Advance Dashboard when building a new, identical virtual machine.
Select the Flavor, Network interfaces , Mention VM Name and click on the Create button to complete the VM creation process.
The Advance CloudPe Dashboard allows us to generate a virtual machine from an image in a similar manner.
- Click on Create Virtual Machine
- Specify the Image.
- Specify the Flavor
- Specify the Network
- Specify the remaining things too and Click on Deploy button.
Step 5: Validate the New VM
- Check the Status.
- Test Connectivity: Access the VM via Console, SSH or RDP.
- Verify Applications and Data: Check that all applications and data from the original volume are present and functional.
By following these steps, you can successfully create a new VM using the snapshot of an existing volume.